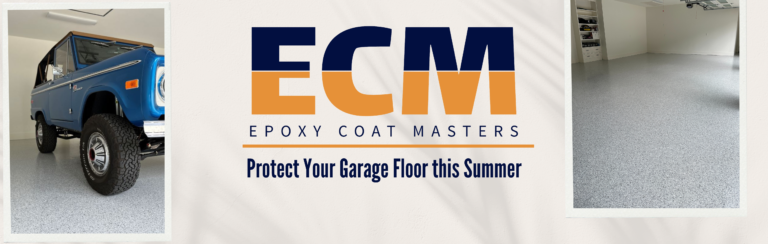
New Year, New Garage Planning Checklist
New Year, New Garage: Your Complete Planning Checklist
Quick Answer: Planning a garage transformation is simpler than you think. Clarify your vision and budget, choose your coating style, clear your garage, and schedule installation. Many Tyler homeowners can go from decision to finished floor in just a few days – especially with the right company to help them (AKA Epoxy Coat Masters :))
There’s something refreshing about a new year. It’s the perfect time to tackle that garage project you’ve been thinking about (and putting off since last spring). The good news? This doesn’t have to be a months-long process. With the right planning, you can move quickly from idea to reality.
After guiding hundreds of East Texas homeowners through this process, we’ve created a straightforward garage planning checklist. Follow these steps, and you’ll be ready to transform your garage without the overwhelm.
Step 1: Clarify Your Vision
Before you research coating options or get quotes, answer these fundamental questions:
How will you use this space?
- Just parking and basic storage?
- Workshop or hobby space?
- Home gym or entertainment area?
- Multi-functional (all of the above)?
Your answer impacts what you need. A simple parking garage has different requirements than a woodworking shop that needs chemical resistance and durability.
What frustrates you about your current garage?
- Oil stains that won’t come clean?
- Cracking or peeling old coating?
- Cold, uninviting concrete?
- Dust that gets tracked into your house?
- Lack of organization?
Identifying pain points helps you prioritize features that solve real problems.
What’s your aesthetic goal?
- Modern and sleek?
- Industrial workshop?
- Warm and inviting?
- Match your home’s style?
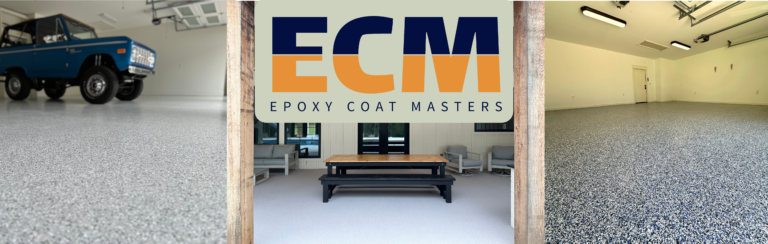
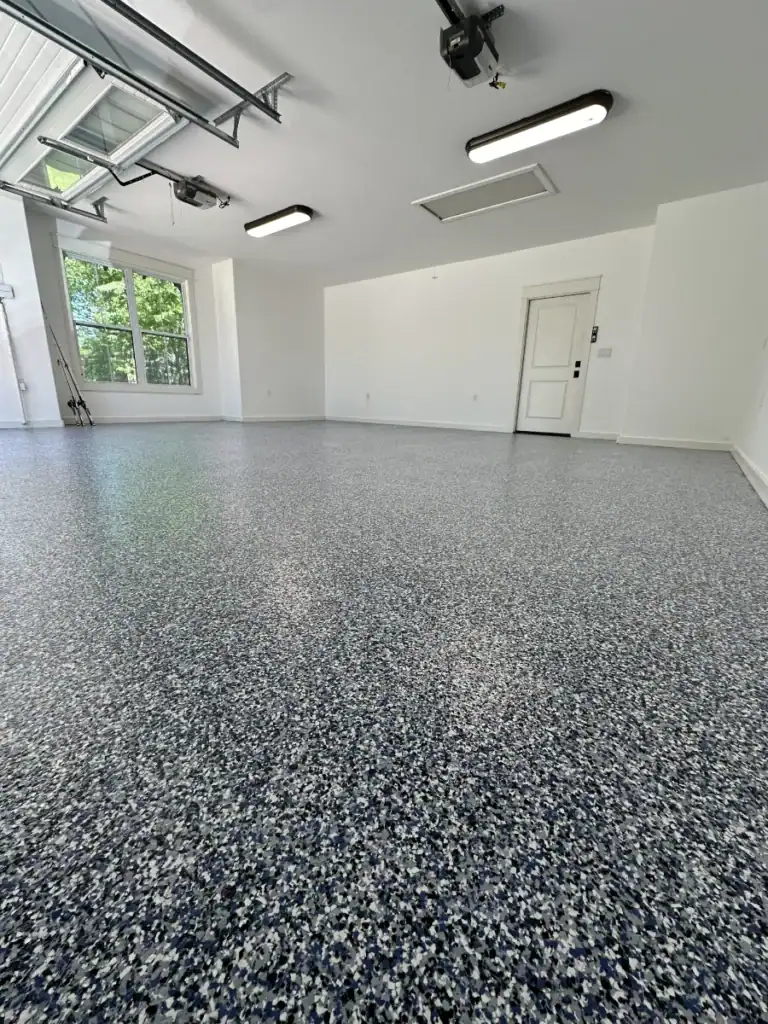
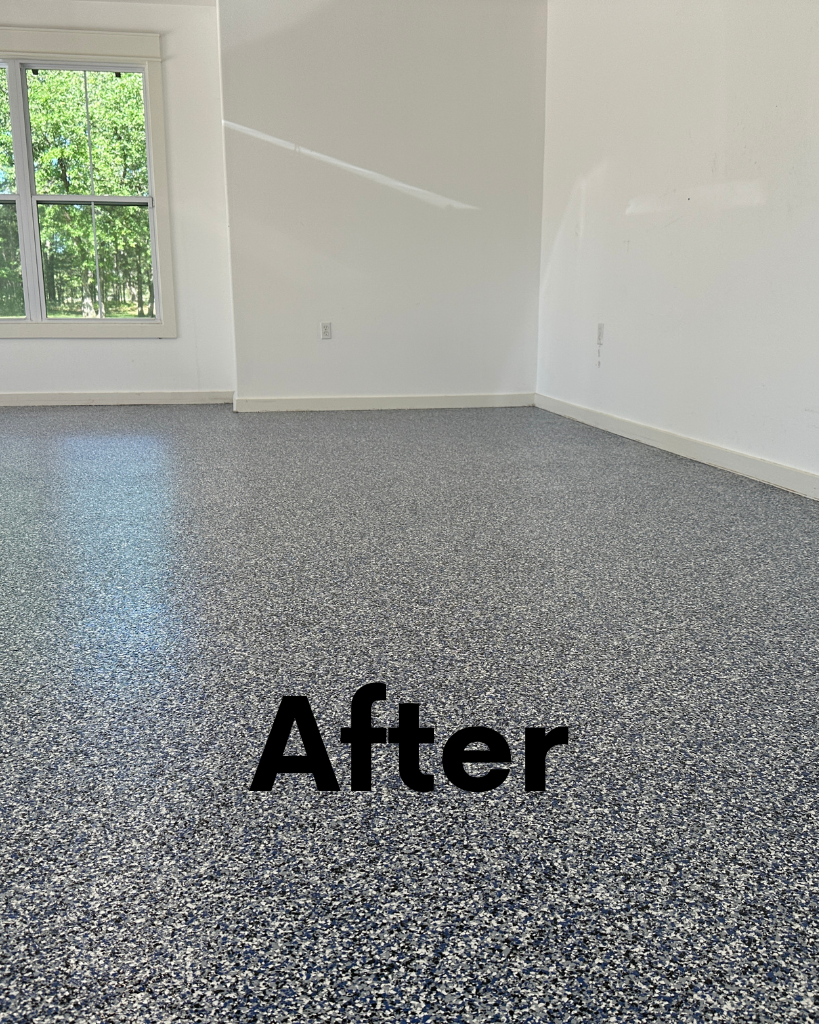
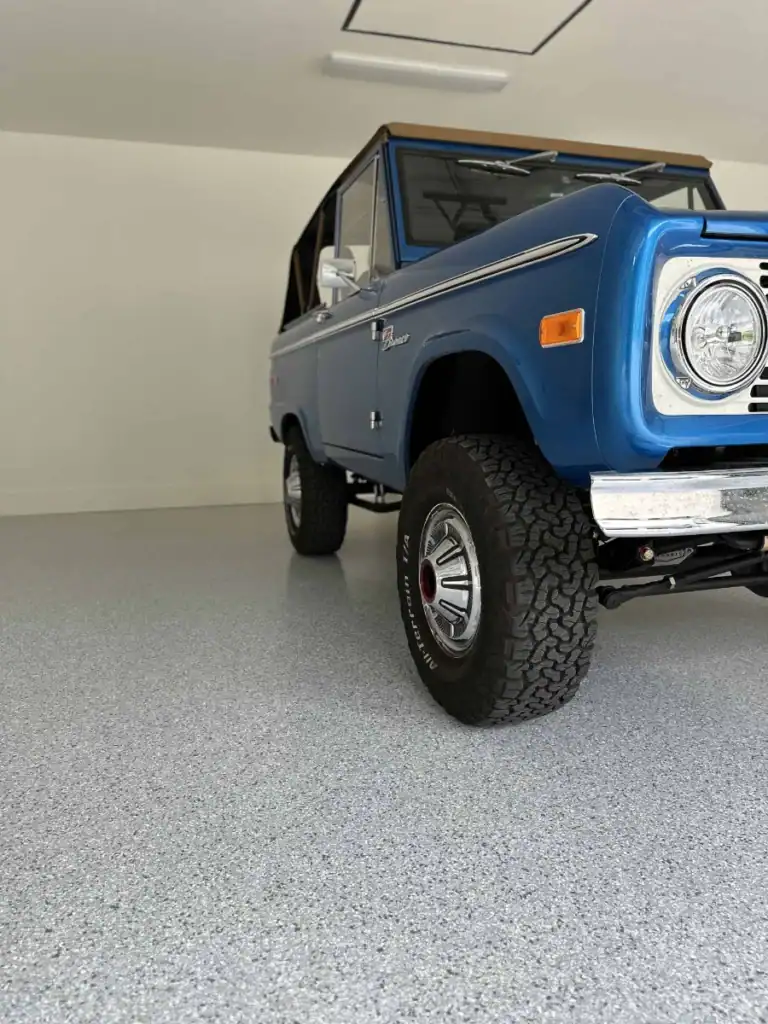
Look at project galleries or browse inspiration photos. Save 3-5 examples of floors you love. Colors like Tidal Wave (a sophisticated gray-blue) or classic neutrals with metallic flakes can completely change the feel of your space.
Step 2: Measure Your Space
Grab a tape measure (or measuring app) and record:
- Total square footage of the garage floor (length × width)
- Additional area if you have concrete that goes up the wall, steps, etc.
- Garage door type (you’ll need to keep it open during installation)
Most East Texas garages range from 400-800 square feet (single to three-car). Knowing your exact square footage helps you budget accurately and compare quotes fairly.
Step 3: Set a Realistic Budget
Professional polyaspartic floor coating from a reputable company in Tyler, Longview, and surrounding areas typically starts at $7 per square foot and goes up from there based on several factors:
What affects your price:
- Garage size and layout
- Current floor condition (existing coatings add removal costs, poor condition requires extra prep)
- Custom flake colors or metallic/glitter additions
- Additional services
For comparison, DIY epoxy kits run $1-2 per square foot but often fail within 1-2 years with no warranty and all the labor falling on you.
Budget beyond flooring:
- Temporary storage during installation (if needed)
- Organization systems post-installation
- Any furniture or equipment for your new space
- Other garage upgrades if you’re doing a complete transformation
Pro tip: If one contractor’s quote seems significantly lower than others, there’s usually a reason – and it’s rarely good. Quality preparation and materials cost what they cost.
Step 4: Understand Your Options
East Texas homeowners have three main coating choices:
1. DIY Epoxy Kits ($1-2/sq ft)
- Pros: Lowest upfront cost
- Cons: Often fail within 1-2 years, no warranty, you do all the work
- Best for: Temporary solutions or rental properties
2. Traditional Epoxy (Professional)
- Pros: Moderate cost, been around forever
- Cons: Yellows in UV, longer cure time, less flexible
- Best for: Fully enclosed spaces with no sun exposure
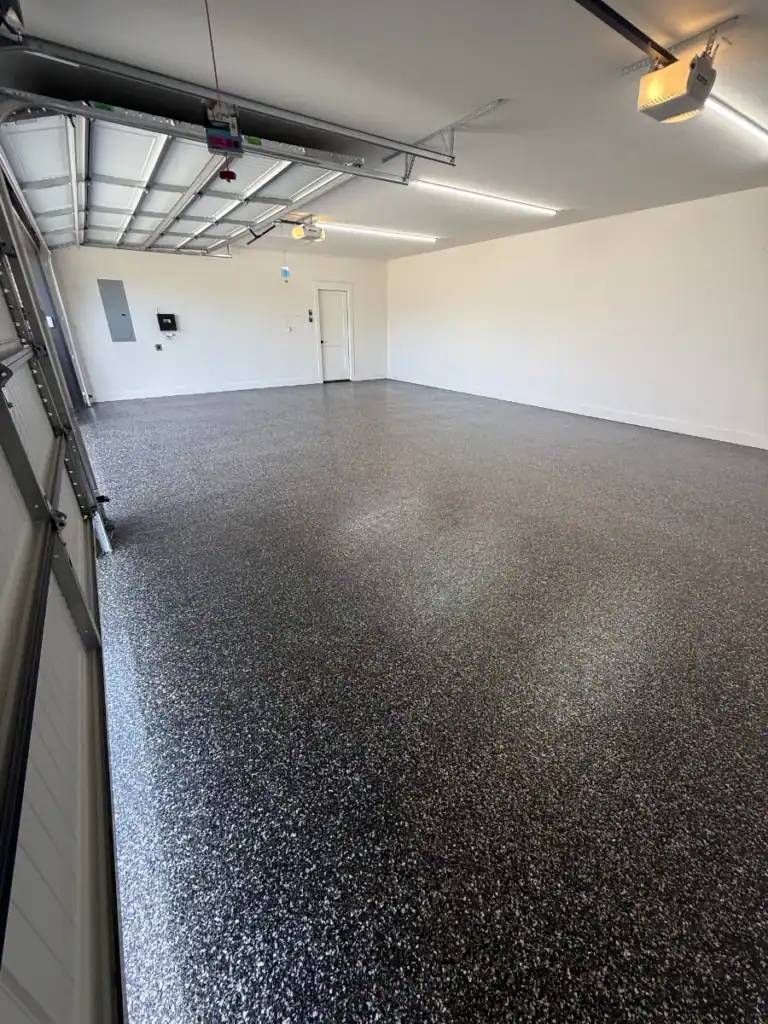
3. Polyaspartic Systems (Professional)
- Pros: UV-stable, fast cure, superior durability, lifetime warranty
- Cons: Higher upfront investment
- Best for: East Texas climate, long-term quality, garages with sun exposure
For 95% of East Texas homes, polyaspartic is the right choice. Our climate demands UV resistance and flexibility that epoxy can’t provide.
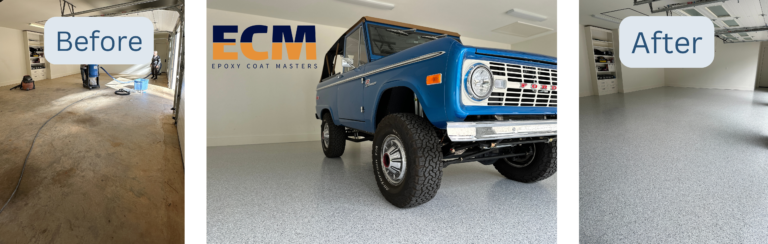
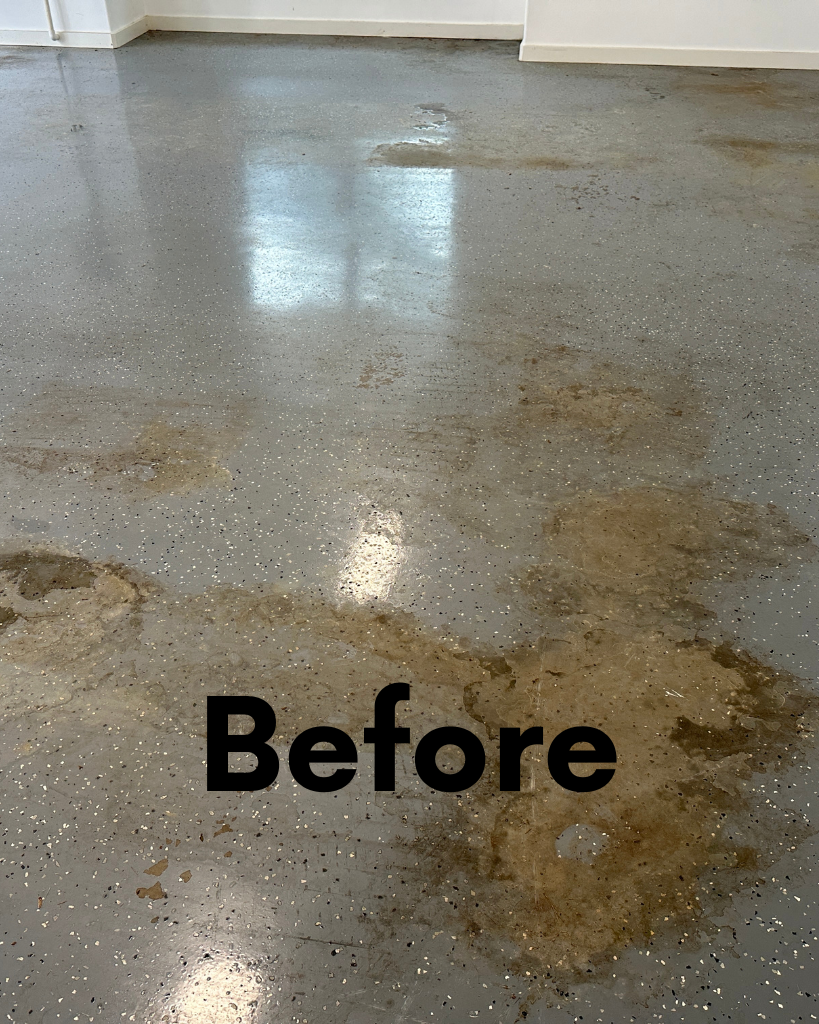
In the before picture below, the homeowners had a painter apply a traditional epoxy DIY type of product in their garage. It quickly failed and left them with an eyesore. We came in and removed the old epoxy, properly prepared the concrete, and applied and new coating with top of the line products. This is an example of going with the ‘budget’ option and ultimately paying more in the end – because you paid to get it done poorly and then had to pay to get it fixed.
Step 5: Vet Your Contractor
Not all concrete coating companies are created equal. Look for:
✓ Specialized expertise in decorative flake and quartz systems (not just basic garage coatings)
✓ Local reputation with reviews from Tyler, Longview, Lindale area homeowners
✓ Portfolio of completed projects you can view
✓ Clear warranty (lifetime on materials and workmanship)
✓ Transparent process explaining each step
Red flags to avoid:
- ✗ “We’ll be in your area and can give you a discount today only”
- ✗ No local references or portfolio
- ✗ Pressure to sign immediately
- ✗ Unwillingness to explain their process
- ✗ Price that seems too good to be true
Step 6: Choose Your Style
With your contractor, select:
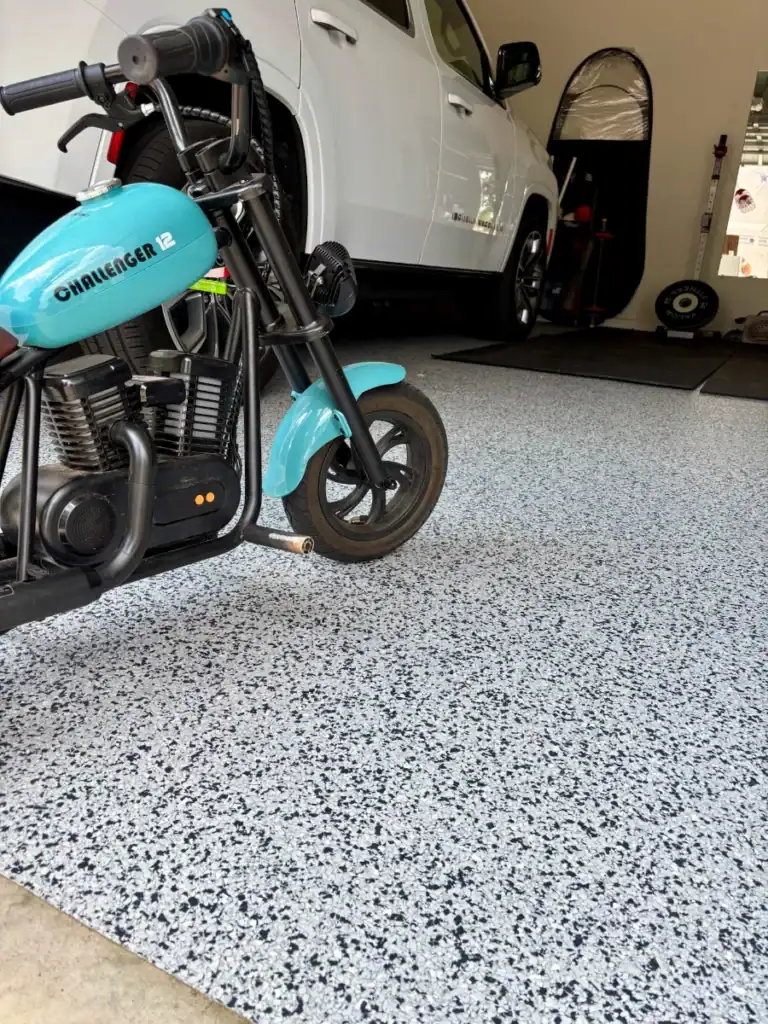
- Flake size (we use quarter-inch flakes for optimal coverage and durability)
- Flake blend (2-4 colors that complement each other)
- Base coat color (gray, tan, beige, brown, or custom. The right base depends on what color of flake you choose – we will help you with this step!)
- Custom additions (metallic flakes or glitter for shimmer effects)
- Finish (satin or gloss polyaspartic top coat)
Pro tip: Request actual flake samples to view in your garage lighting. Colors look dramatically different in overhead fluorescent vs. natural sunlight vs. LED bulbs.
Don’t rush this decision. You’ll live with these choices for decades. Remember, we purchase flakes specifically for your project, so changing your mind after ordering means additional shipping costs, product costs, and time. If we’ve already applied flakes and you want to switch, there will be extra labor and supply costs – though we have accommodated this for homeowners when needed.
Step 7: Prepare Your Space
Declutter & Organize
Your garage needs to be completely empty for installation. This is the perfect excuse for a deep purge:
Sort everything into four categories:
- Keep & store elsewhere temporarily (borrowed space, storage unit)
- Keep & organize post-installation (decide on storage solutions)
- Donate/sell (working items you don’t use)
- Trash (broken, expired, or unusable items)
Coordinate Other Improvements
If you’re planning a complete garage transformation, we have the connections and crew to coordinate everything. We can help arrange:
- Wall painting or paneling (best done before your floor)
- Electrical upgrades (lighting, outlets)
- HVAC installation (mini-splits for climate control)
- Storage systems and cabinets (installed after your floor)
If you’re interested in more than just flooring, let us know during your consultation. We can coordinate the entire project so everything flows smoothly and looks cohesive.
Step 8: Schedule Your Installation
In East Texas, we can install year-round. If the weather is extreme, we may adjust the products slightly to slow down or speed up cure time. Ideal conditions are:
- Temperatures: 50-90°F for optimal curing
- Dry weather: No rain expected for 48 hours before/after
Best times in East Texas:
- Spring (March-May): Mild temps, lower humidity
- Fall (September-November): Comfortable weather, post-summer
- Winter (December-February): Cooler but very doable
- Summer (June-August): Hot but manageable with proper scheduling
You can move quickly once you’re ready – some homeowners go from consultation to finished floor in just days.
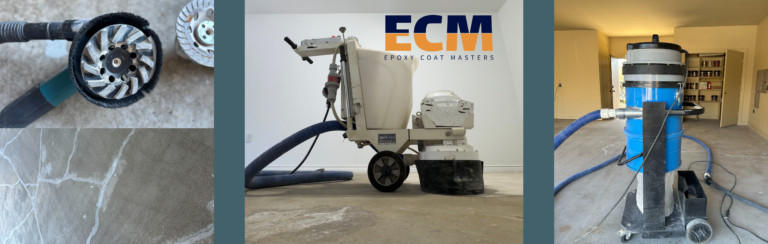
Step 9: Installation Day Prep
Before the crew arrives:
- ✓ Garage is completely empty
- ✓ Water and power are accessible
- ✓ Garage door functions properly (needs to stay open)
- ✓ Pets are secured indoors
During installation (typically 2-3 days):
- Day 1: Surface prep, crack repair, base coat, and flake broadcast
- Day 2: Scraping, palm sanding, and often the polyaspartic top coat
- Day 3: Final top coat if needed based on conditions
You’ll need to park in your driveway or street during this period.
Step 10: Enjoy Your New Space
Timeline:
- 24 hours: Light foot traffic okay
- 72 hours: Ready for vehicles and normal use
- 7 days: Fully cured and ready for heavy equipment
First week guidelines:
- Avoid dragging heavy objects
- Use furniture pads under anything you move in
- Clean with pH-neutral cleaner and soft broom
- Enjoy your transformed space!
Maximize Your Investment
Once your floor is installed:
☐ Install LED lighting to showcase your new floor
☐ Add rubber mats under workbenches (optional extra protection)
☐ Organize with vertical storage to keep floor space clear
☐ Create zones (parking, storage, workspace)
☐ Maintain regularly with simple sweeping and occasional mopping
☐ Document with photos (before/after for insurance/resale)
Frequently Asked Questions
Q: How quickly can I get this done?
A: Once you’re ready, we can often schedule within days. Installation itself takes 2-3 days, and your garage is usable within 72 hours after completion.
Q: What if my garage floor is in poor condition?
A: We handle all necessary elements of the surface preparation. This is factored into your quote after we assess your specific floor. If there is something major going on with your concrete that we cannot addres, we will discuss that in the intial meeting and determine the best course of action.
Q: What if I have an existing coating?
A: We can remove old coatings as part of the process. This adds to the project cost but ensures proper adhesion and long-lasting results.
Q: Can I change my flake color after you’ve ordered supplies?
A: We purchase flakes specifically for your project ahead of time. If you change your mind before we apply them, we may be able to return and reorder, but this requires additional shipping costs and time. If we’ve already applied the flakes, changing will involve extra labor and material costs. We’ve done this for a few homeowners, but it’s much better to be confident upfront – that’s why we have samples!
Start Your New Year, New Garage Journey
Transforming your garage doesn’t have to be complicated or overwhelming. With clear vision, the right contractor, and a simple plan, you can go from bare concrete to a beautiful, durable floor in just a few days.
Ready to turn your garage goals into reality? Schedule a free consultation with Epoxy Coat Masters and get expert guidance customized to your specific space and needs.
Call (903) 805-6149 or visit epoxycoatmasters.com to get started.
Serving Tyler, Longview, Whitehouse, Lindale, and all East Texas communities with premium garage flooring solutions – whenever you’re ready.